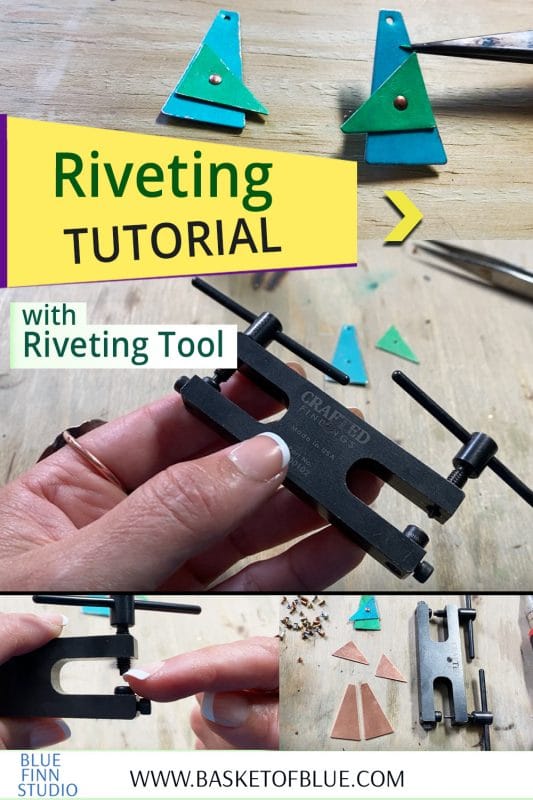
Use a riveting tool to make easy, clean looking rivets on metal. In this tutorial you will make copper patina earrings that have two contrasting pieces riveted together. You will patinate the copper with patina paints (Vintaj patina or similar product for metals). We are using the CraftedFindings riveting tool that both makes the hole and inserts the rivet.
What you need:
4 pieces of copper (2 for each earring, one smaller one bigger) 26-24 gauge thickness
riveting tool (CraftedFindings, link at the end of tutorial)
patina paints (Vintaj or similar, at least 2 colors)
plastic cups for patina and a foam paint sponge or small brush
rivets (tool usually comes with a sample pack)
center hole punch (optional)
Sharpie pen or similar to draw on copper
Riveting Instructions
Create your design or use a design in the tutorial. You are riveting two pieces of metal together and patinating each with a color. Have your copper pieces ready, you can buy precut pieces (see sources at the end of article), or cut your own and sand any sharp edges smooth. Get familiar with the tool (see video below) and how to use it. One end is for making the hole, the other is for riveting.
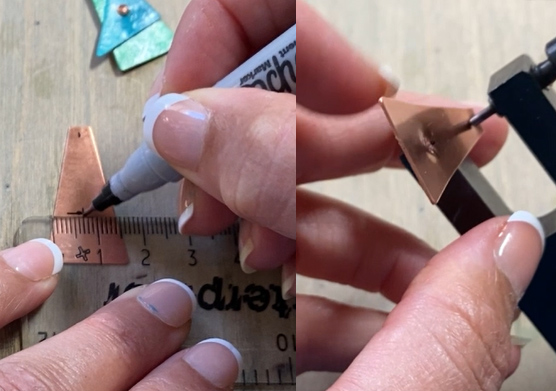
Step 1 – Make holes
Mark the copper with sharpie for the hole position. Measure carefully (see video). It is a good idea to use a center punch to make a divet first, it will make it easier to align the riveting tool (hole making end) to the right spot. Mark and cut a hole to hang the earring (to an earwire) on the top of the large piece first. Then align the second (smaller) piece as you wish on top of the larger piece and mark the hole on the second (smaller) piece. Cut that hole out. Lastly use the small piece to align it to the larger piece as you wish and draw a mark through the hole on the large piece. Cut out the second hole in the larger piece. Do the same with the second earring.
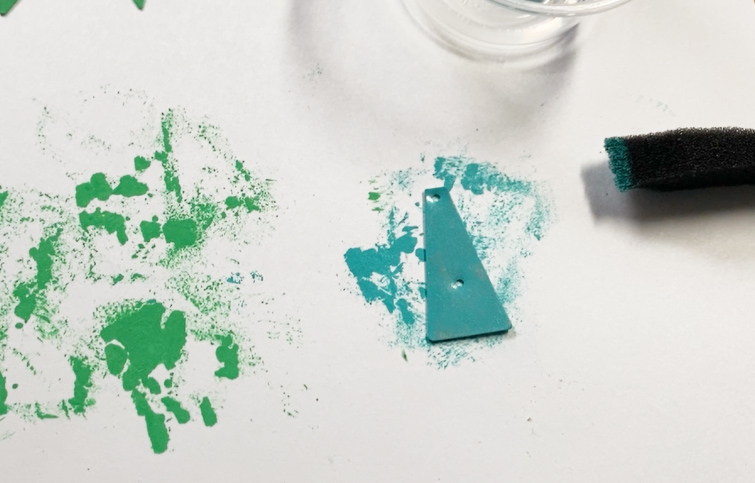
Step 2 – Add patina
Read the patina instructions, most patina paints require shaking to premix them properly. Then pour a small amount to a plastic cup. You can use a paint foam sponge or a small paint brush to apply the patina. Sometimes even a rag or small piece of fabric will do. Patinate your copper with patina paints as you wish. An easy way is to use two colors, one for the top piece and the other for the bottom piece. Let them dry thoroughly. If you wish sand or buff some of the paint off for a more rustic effect.
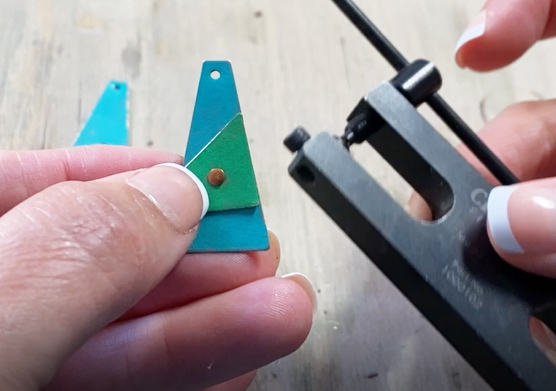
Step 3 – Prepare for riveting
Make sure you have watched the video riveting section before you start. Choose the rivets you are going to use, generally you need the rivet to be slightly longer than the thickness of the two pieces of metal (note that the patina paint adds thickness). In the video I used a 2mm rivet, it is borderline too short. To be sure, I would use one that’s a bit longer. It will create a little more bulk on the underside, but will create a more secure rivet.
Push the rivet through the top piece, then continue through the bottom piece. (If it won’t go through the hole, file the hole carefully with a round metal file. Do just a few turns at a time so you don’t make the hole too big. It needs to be nice and snug fit.)
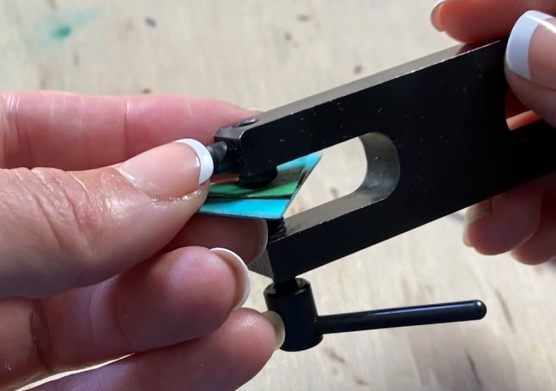
Step 4 – Riveting
Align your 2 pieces with the rivet in the tool. Make sure the end prong in the tool riveting side mechanism goes inside the rivet before tightening. Take your time to get it just right. It may help to turn the tool “upside down” so the rivet is pointing down so it won’t have a chance to fall off. You could also secure the tool in a vise if you have one. If you are unsure, practice first with some scrap metal pieces. Tighten just enough to secure the rivet. Don’t overtighten or you may bend the metal. Do the same with the second earring pieces.
Now admire your results and choose your desired earwires to finish your earrings! (See my other post for info about earwire materials.)
Lorem ipsum dolor sit amet, consectetur adipiscing elit. Ut elit tellus, luctus nec ullamcorper mattis, pulvinar dapibus leo.
Sources for Riveting tool, Patina Paints and Copper